This feature builds upon the existing SeoSamba Blog functionality (already enhanced with AI) by allowing you to create personalized blog posts for multiple websites simultaneously.
Dynamic Widgets: Descriptions can include dynamic widgets that automatically populate with location-specific details like city, state, zip code, etc.
Location-aware AI: The AI content generation considers each location's individual characteristics.
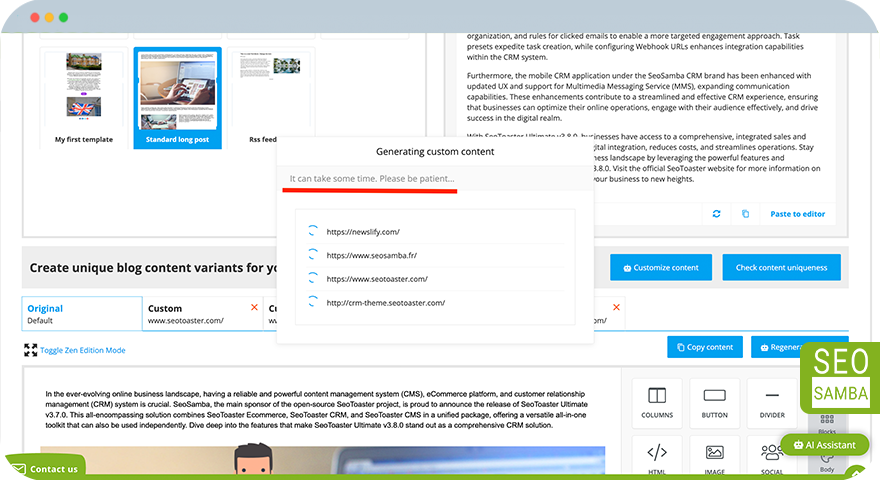
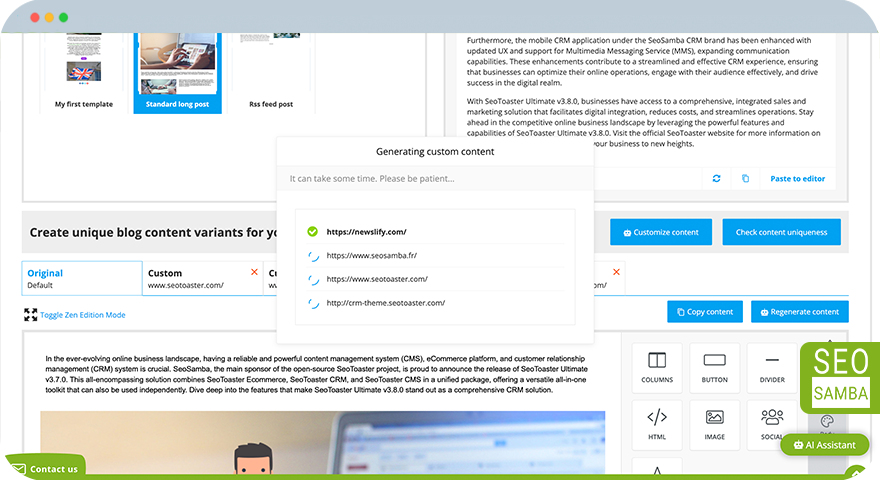
While AI-powered, content generation isn't instantaneous. Allow the system sufficient processing time.
Add a teaser image (use the Image Gallery for options).
Feed the AI Content: Provide the AI system with a blog post or article from a trusted online resource. This gives AI a foundational perspective.
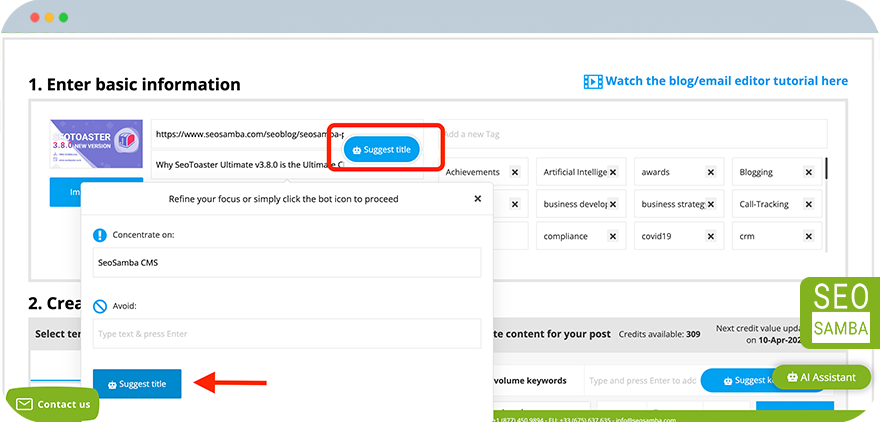
Blog Title: Utilize the AI for title suggestions. A pop-up will appear saying: "Refine your focus or simply click the bot icon to proceed." Use the pop-up to guide the system further by specifying what to include ("Concentrate
on:") and avoid ("Avoid:") in the content.
Description: The AI will automatically generate a description based on the title.
To personalize the description for each location, use the "personalize" icon on the left.
Organize for SEO: Include relevant tags to categorize your blog post and enhance SEO discoverability.
Select a blog post template.
Generate blog post content using the provided menu options: keywords, content length, and style.
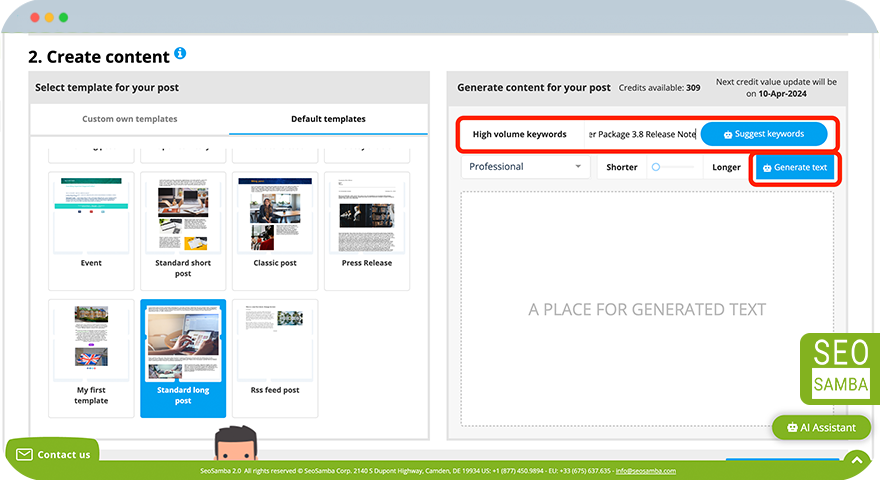
Allow the system time to generate your blog article.

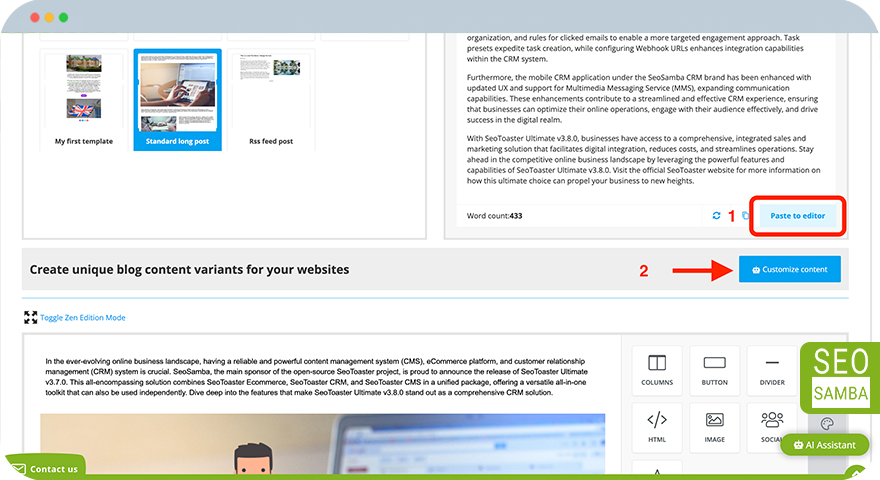
Locate the "Create unique blog content variants for your websites" section and click the "Customize content" button. A dropdown menu will appear allowing you to select the websites you want the blog post customized for. You can further guide the system here by adding "Concentrate on:" and "Avoid:" topics and ideas. Additionally, you can adjust the writing style and post length for each website.
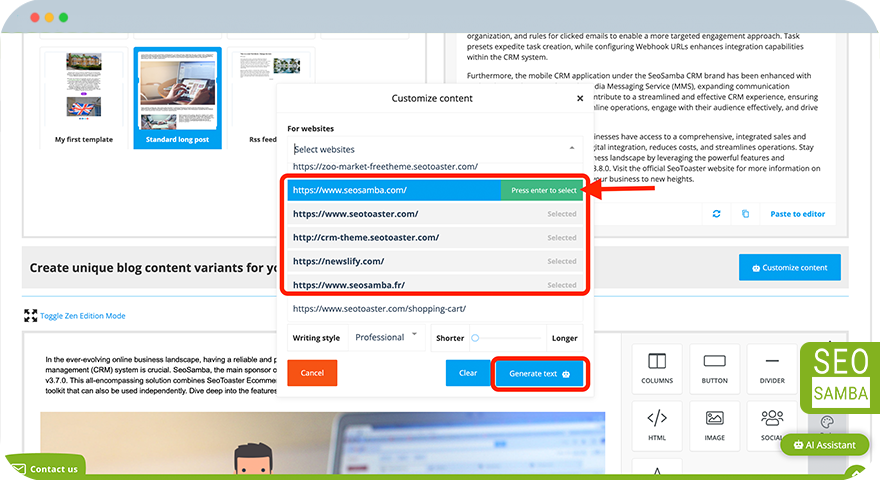
Review and Publish: Once the generation is complete, new tabs will display the content variations for each selected website, indicating content uniqueness.
Proofread and revise the generated content for each website.
When satisfied, click "Save and Distribute."
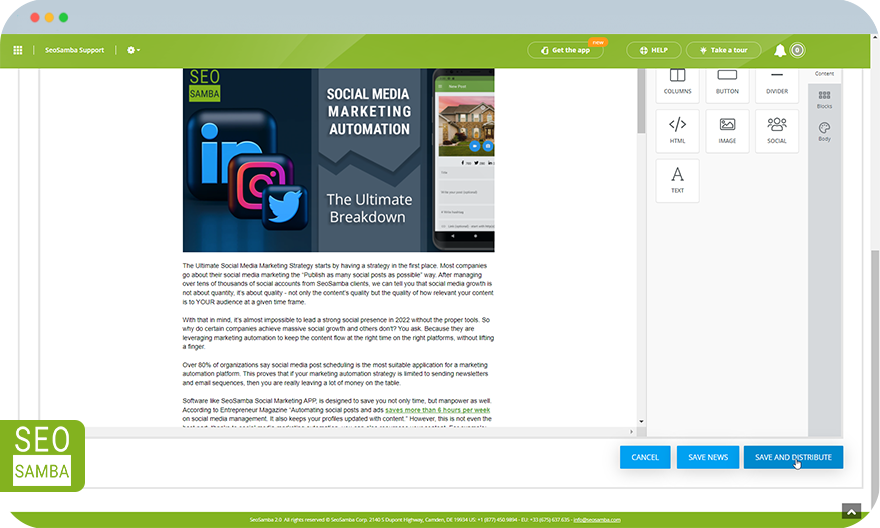
The post will be scheduled for publication on the websites you selected earlier. At this stage, you can also choose the social media accounts where you want to share it.
Finally, with all checkboxes selected, click "Continue and Publish" to complete the process.
Congratulations! You've successfully created multiple blog posts simultaneously.