Create an App in the QuickBooks Developer Dashboard:
To begin, log into your QuickBooks accounts and go to the Developer Dashboard at:
developer.intuit.com/app/developer/dashboard and click "Get your API keys today" button.
Development Settings:
In your QuickBooks Developer Dashboard, click + Add a sandbox company

Give your app a name, click both checkboxes in “Select a scope”, then click “Create app”.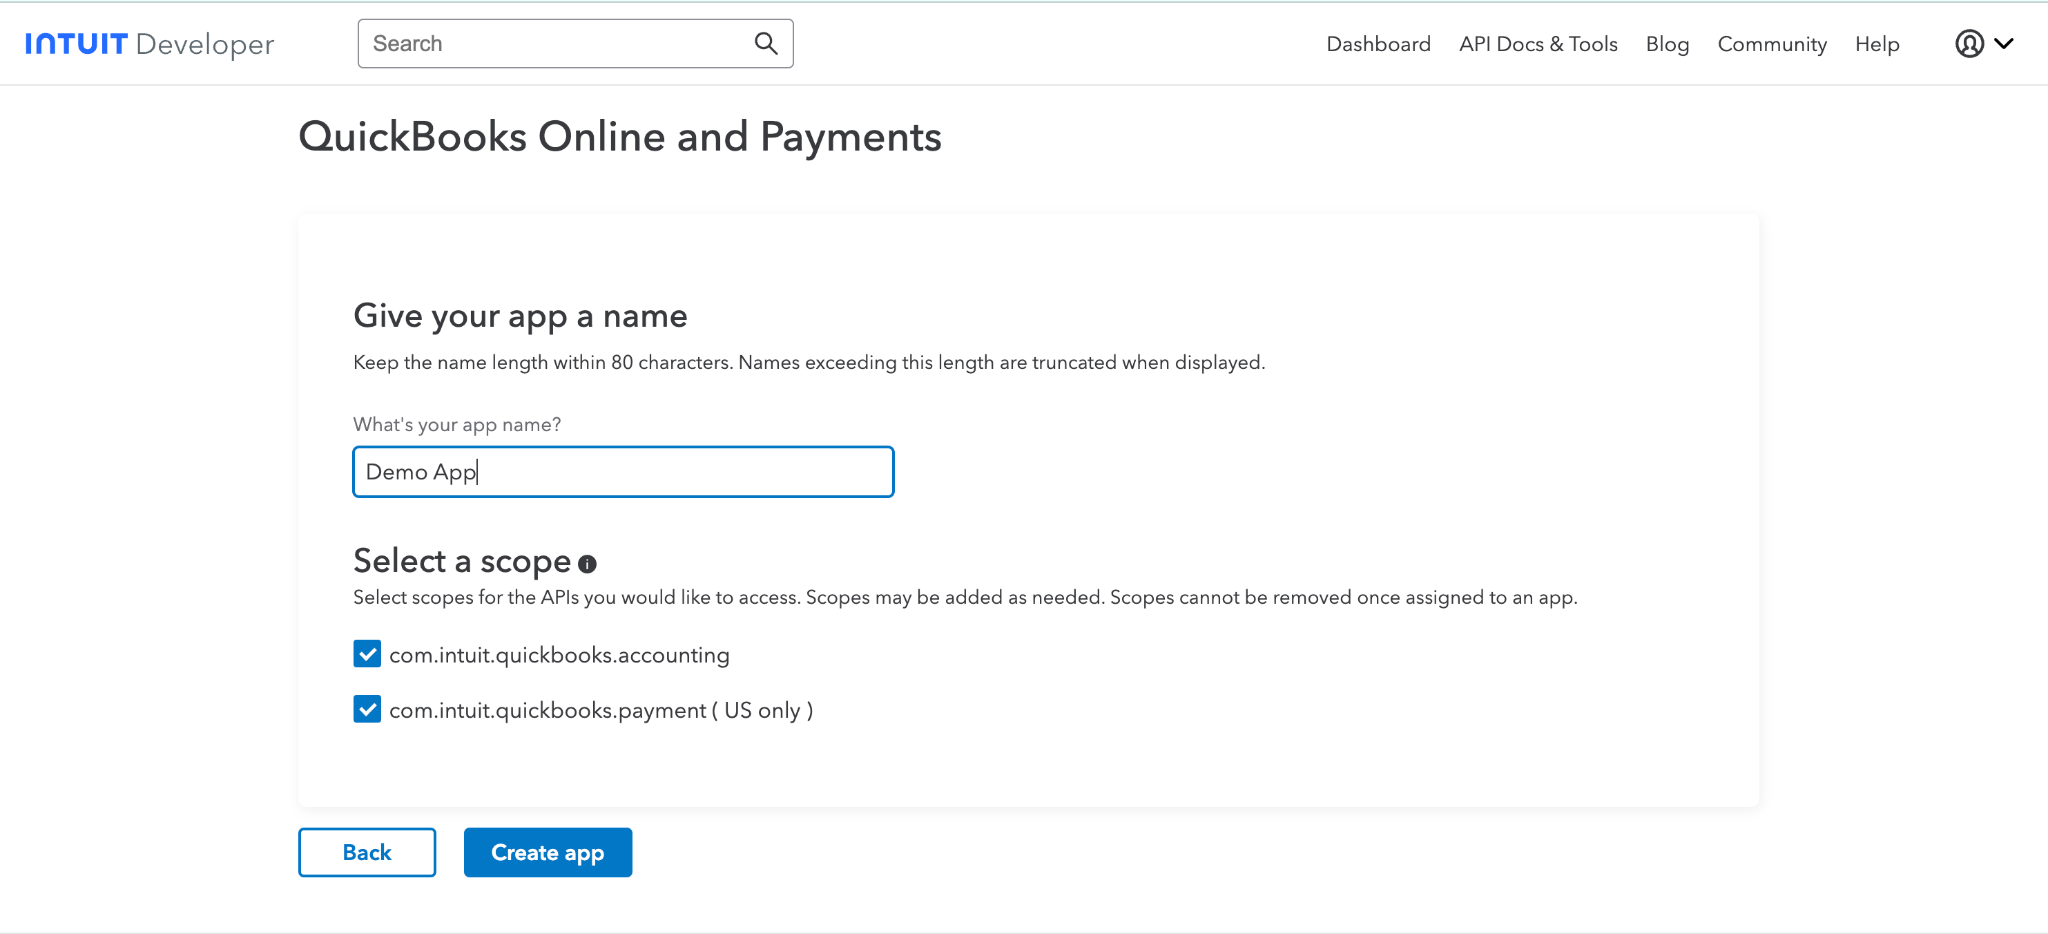
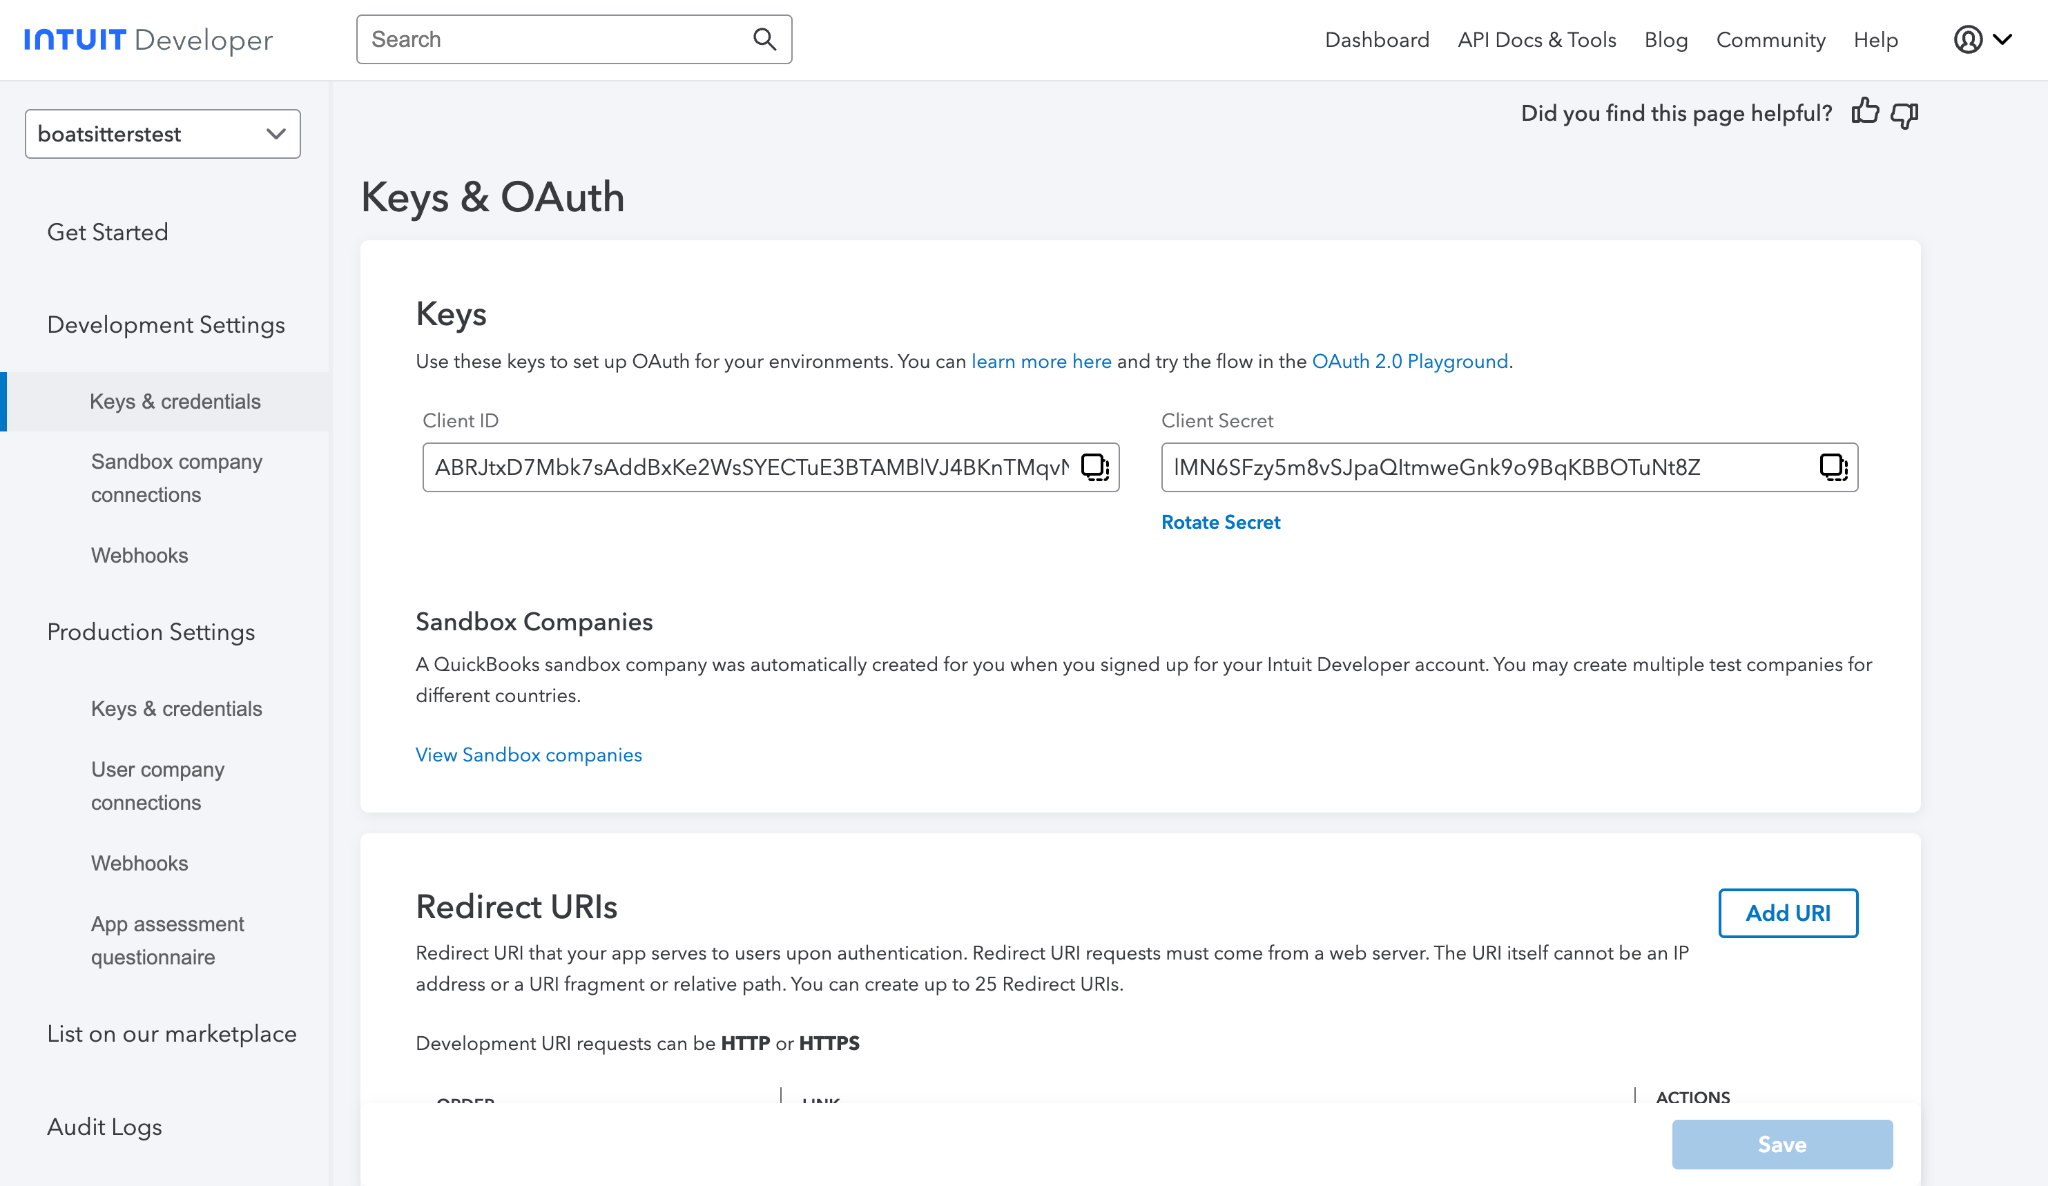
go to Development Settings/Keys & Credentials:

Copy client ID and Client Secret:
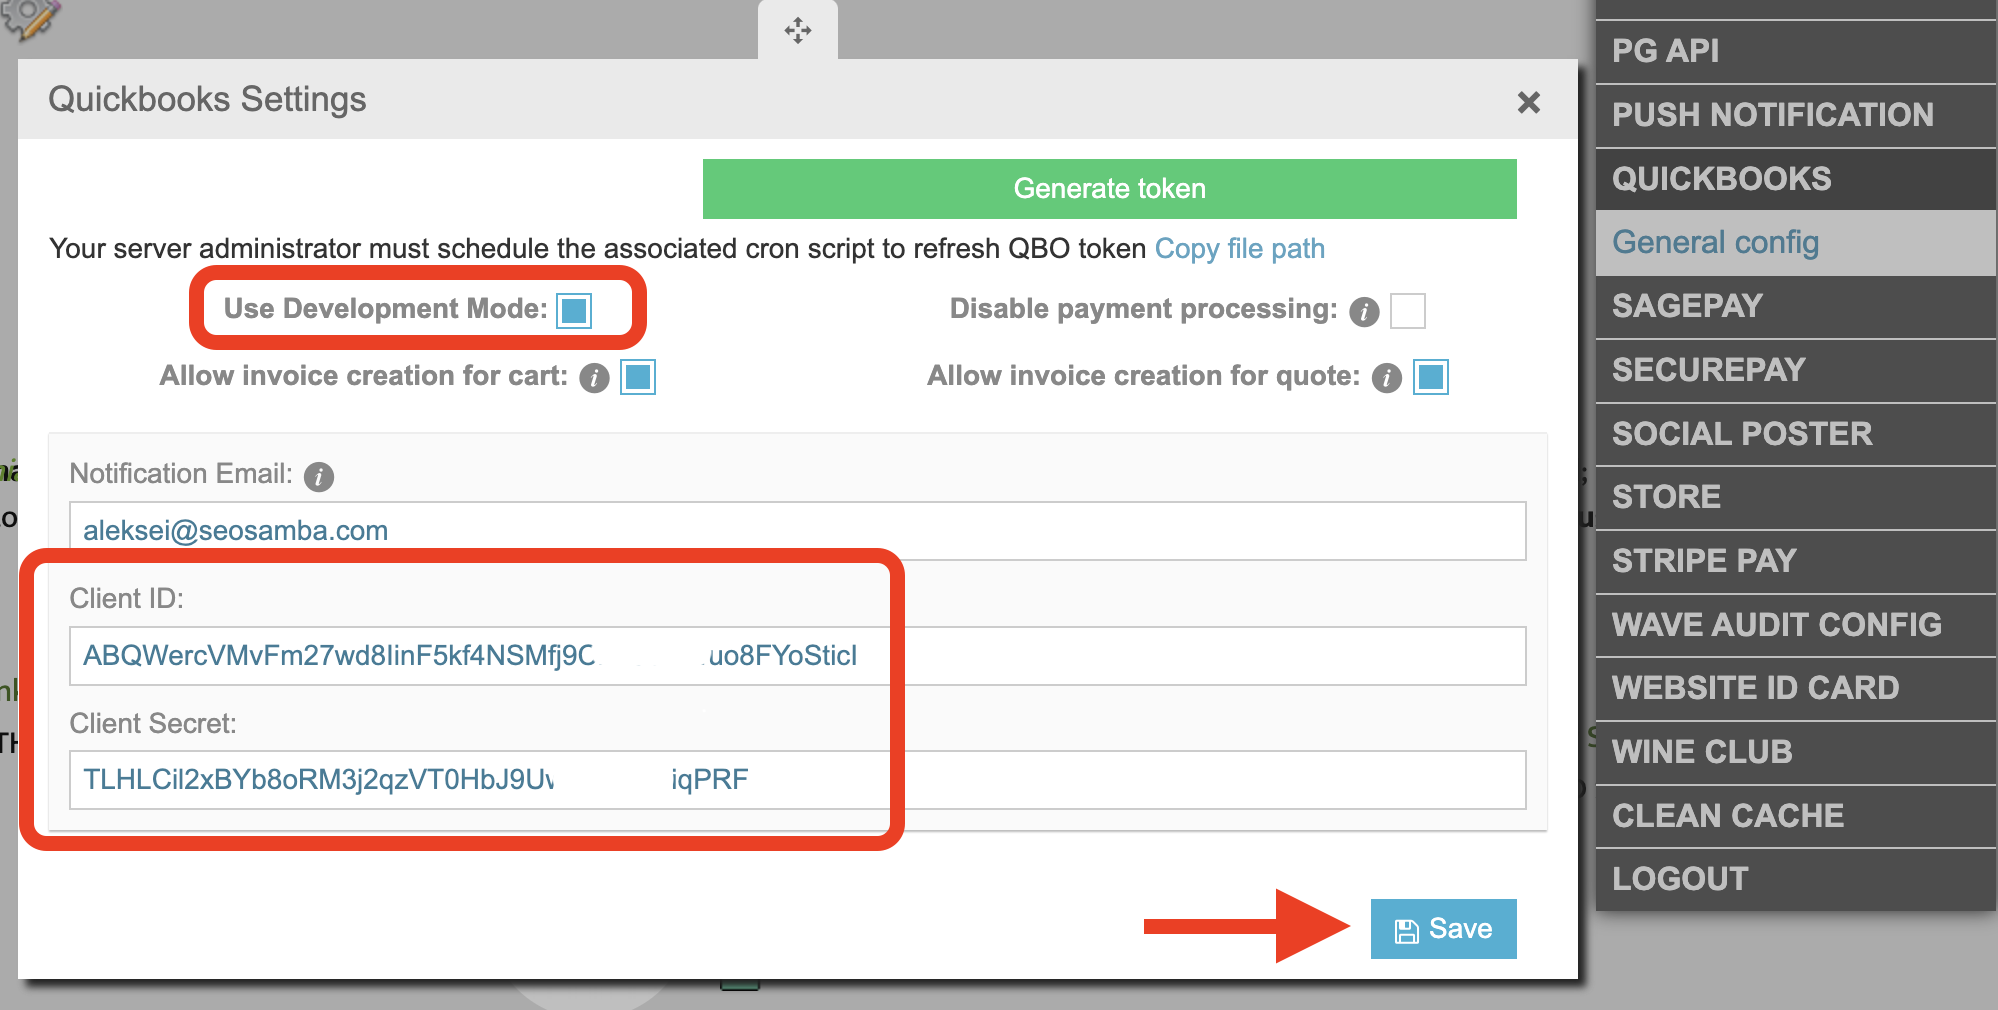
Open the Quickbooks plugin configuration on our website, enable the "Use Development Mode" checkbox on your site. Add the Client ID and Client Secret to the relevant boxes: 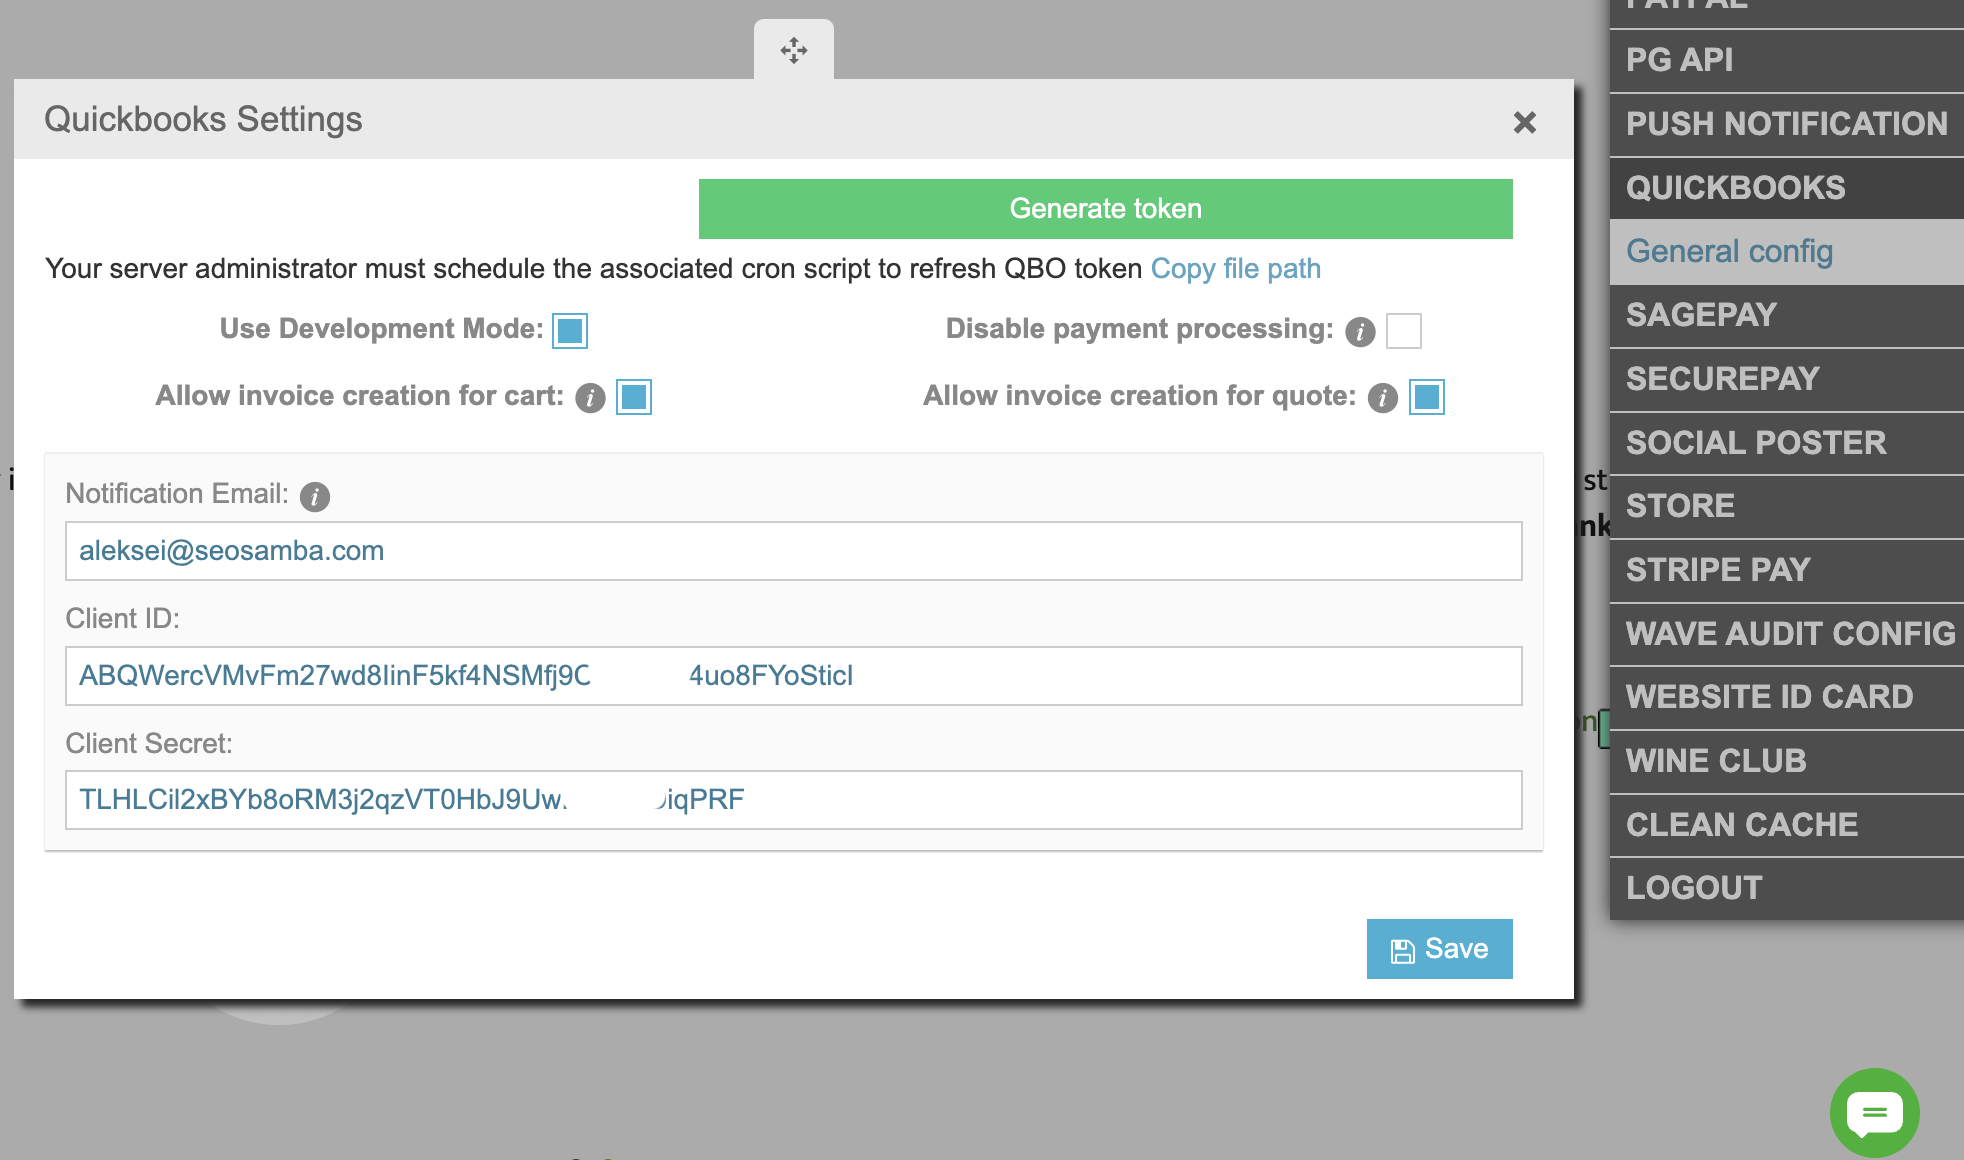
Then, add Redirect URL. Scroll down, you will see the first development URL there, it’s the default one.
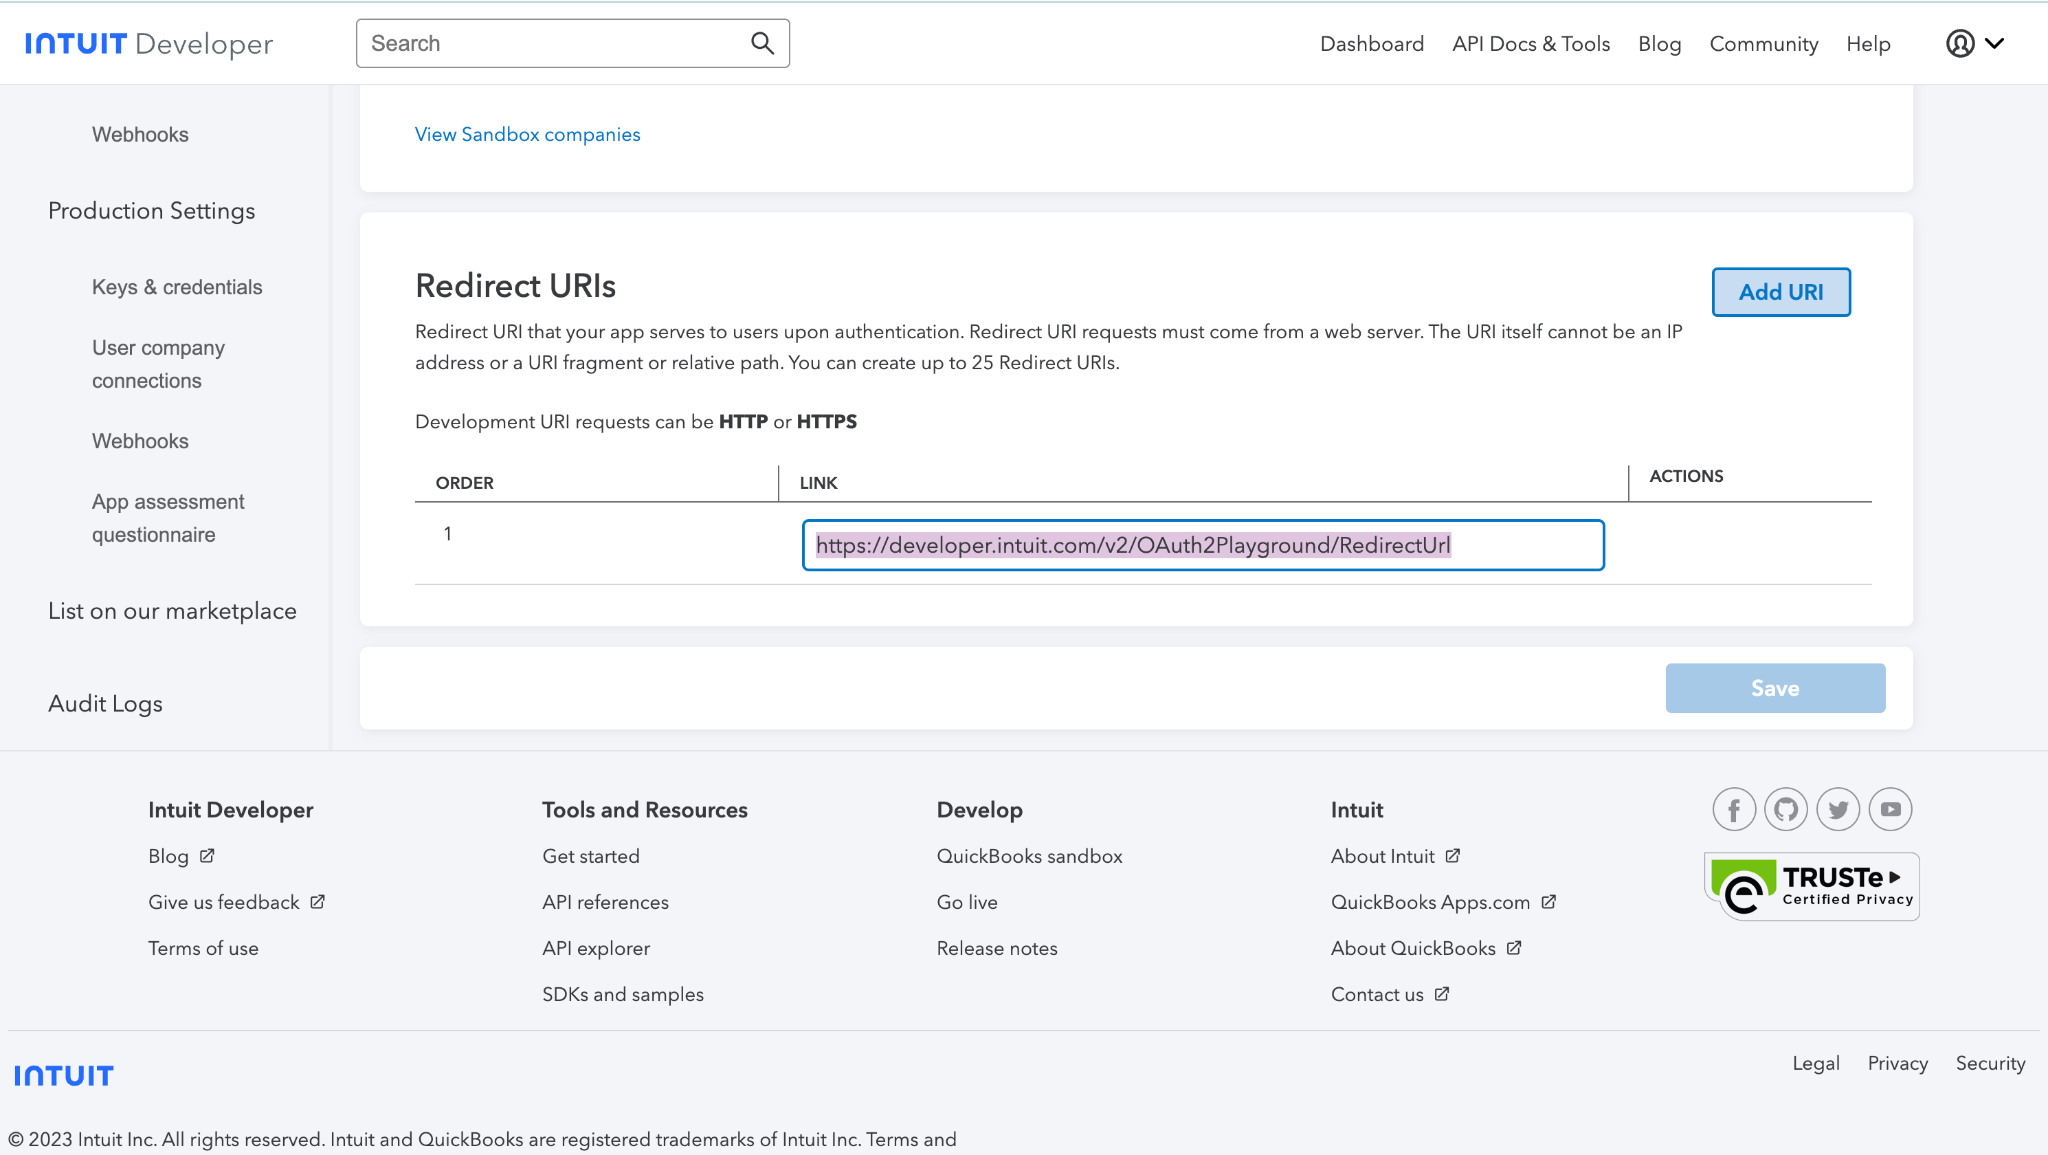
Click Add URL, add the URL using the following pattern:
www.yourdomain.com/plugin/quickbooks/run/successOk
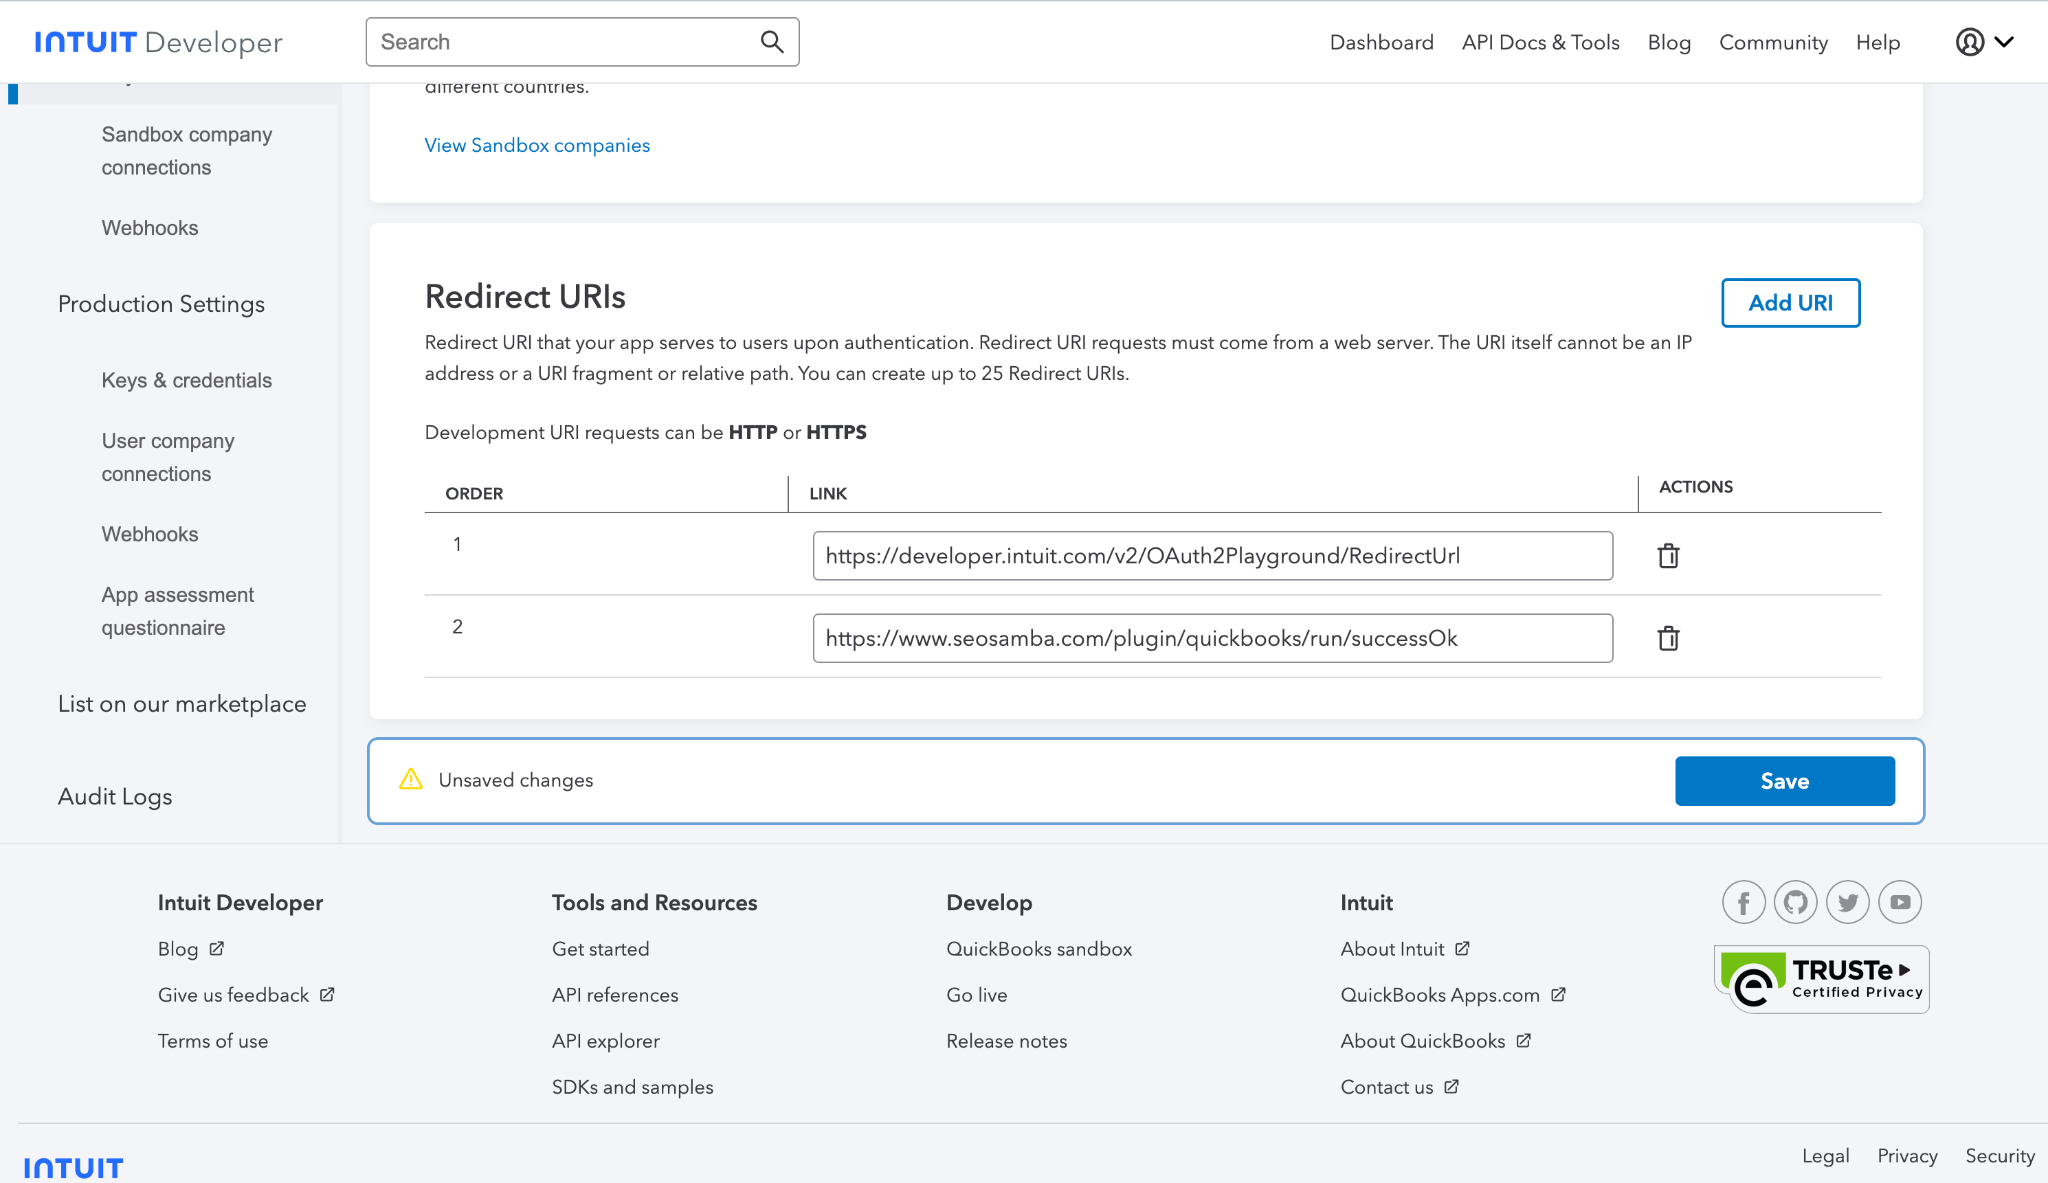
And hit Save.
Generate Token:
Get back to Quickbooks plugin General config click “Generate token” and assign a task to your system administrator ti schedule associated cron script to refresh QuickBooks token - copy the pass in the configs.
Refresh Token Cron Script:
Your server administrator must schedule the associated cron script to refresh the QBO token. The recommended schedule period is 1 week. The location of the script is /home/developer/www/Yourdomain/plugins/quickbooks/system/cronscript/quickbooksRefreshToken.php
Allow Create Invoice.
Mark both checkboxes “Allow Create Invoice for cart” and “Allow Create Invoice for quote”
If you switch this button off, Invoice and Payments will not generate in the system, but the money will charge anyway, just without Quickbooks record creation.

Account Configuration:
In QuickBooks, go to app.qbo.intuit.com/app/customers to configure your account settings.
Production Settings.
After you tested payment using development keys and credentials, you need to disable developer mode and add Production Client ID and Client Secret.
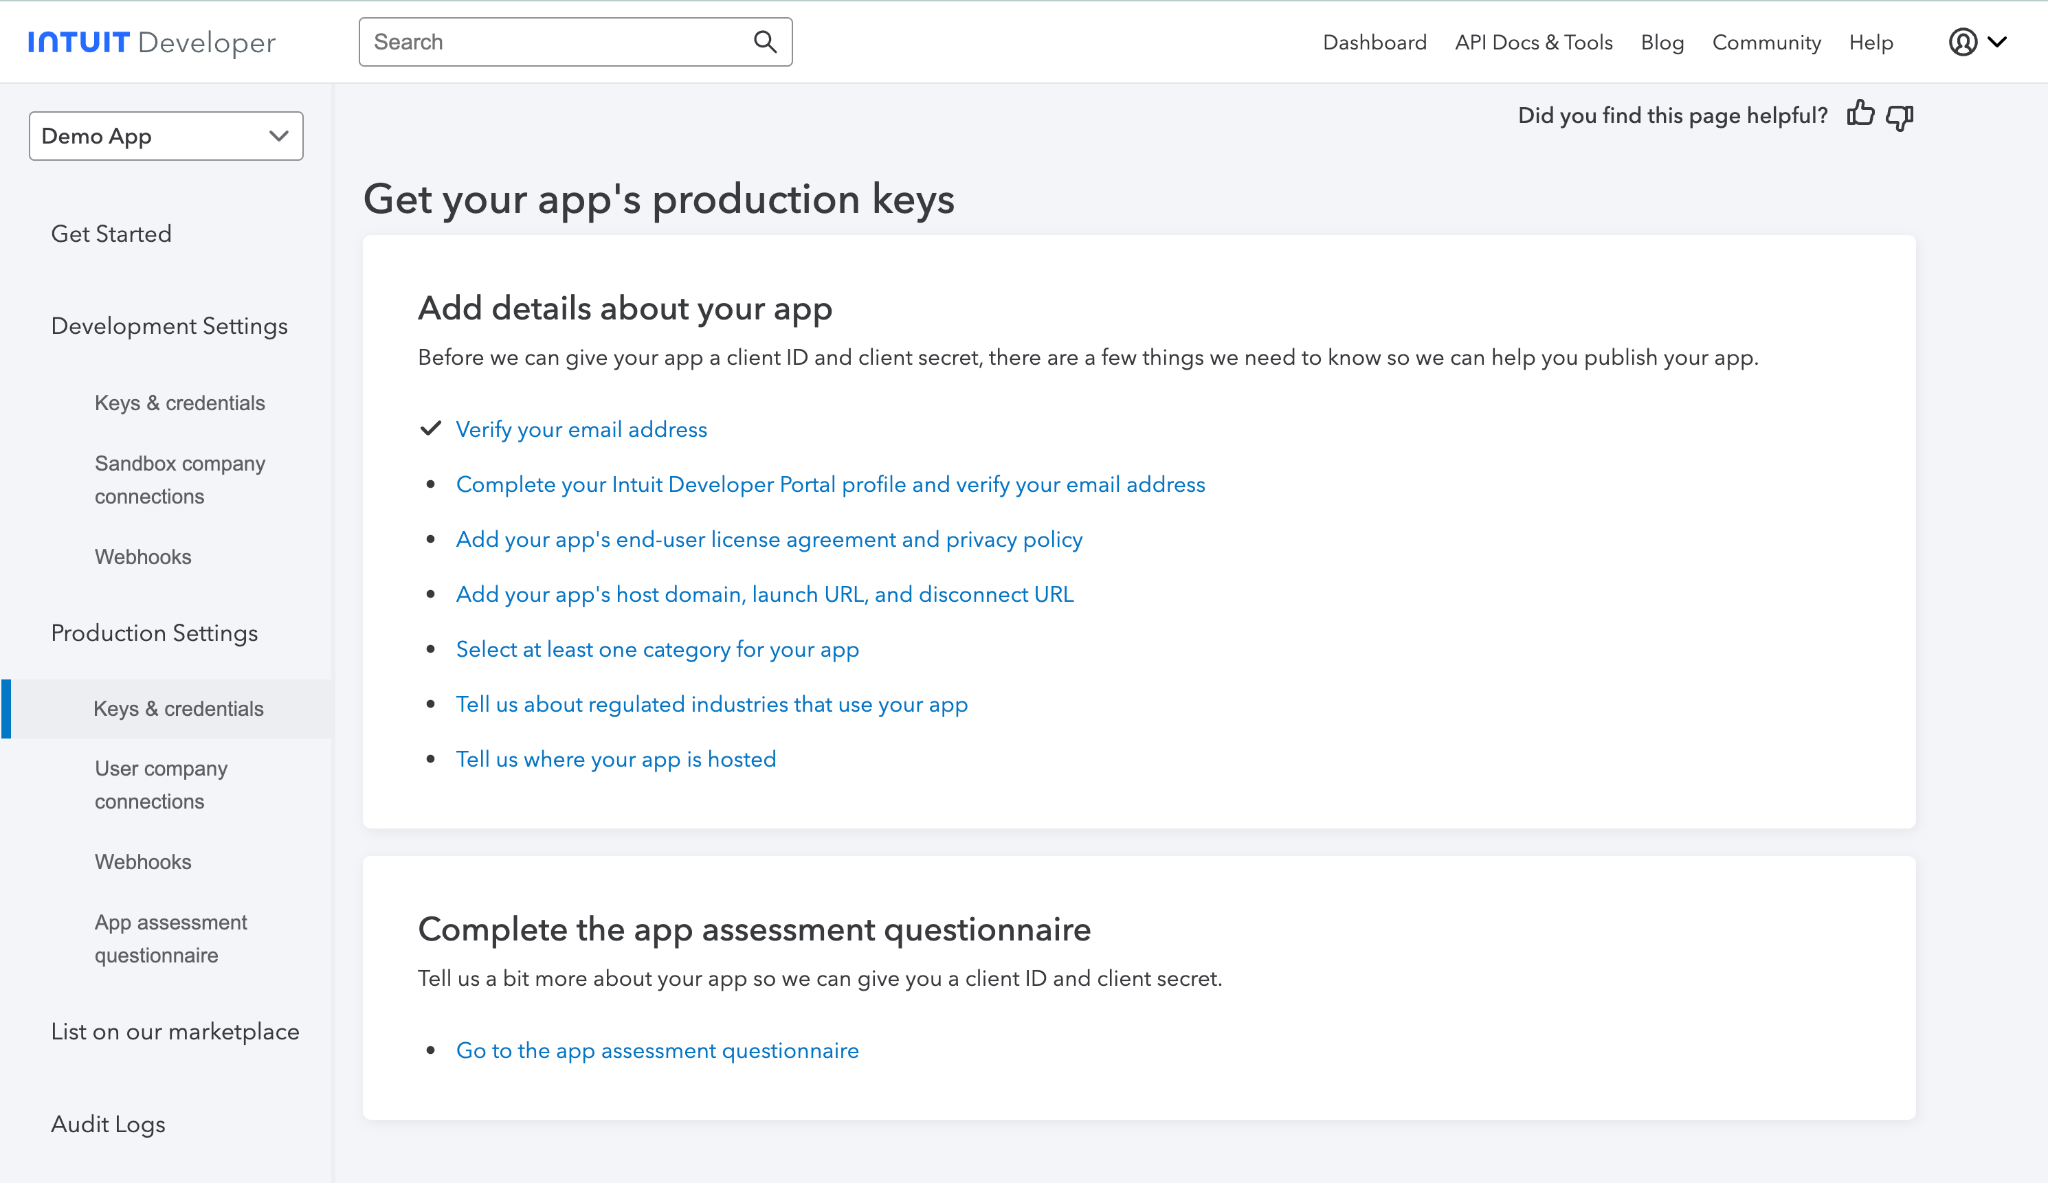
Production Keys and Credentials:
You will get your Production Keys and credentials after filling in the details about your app:
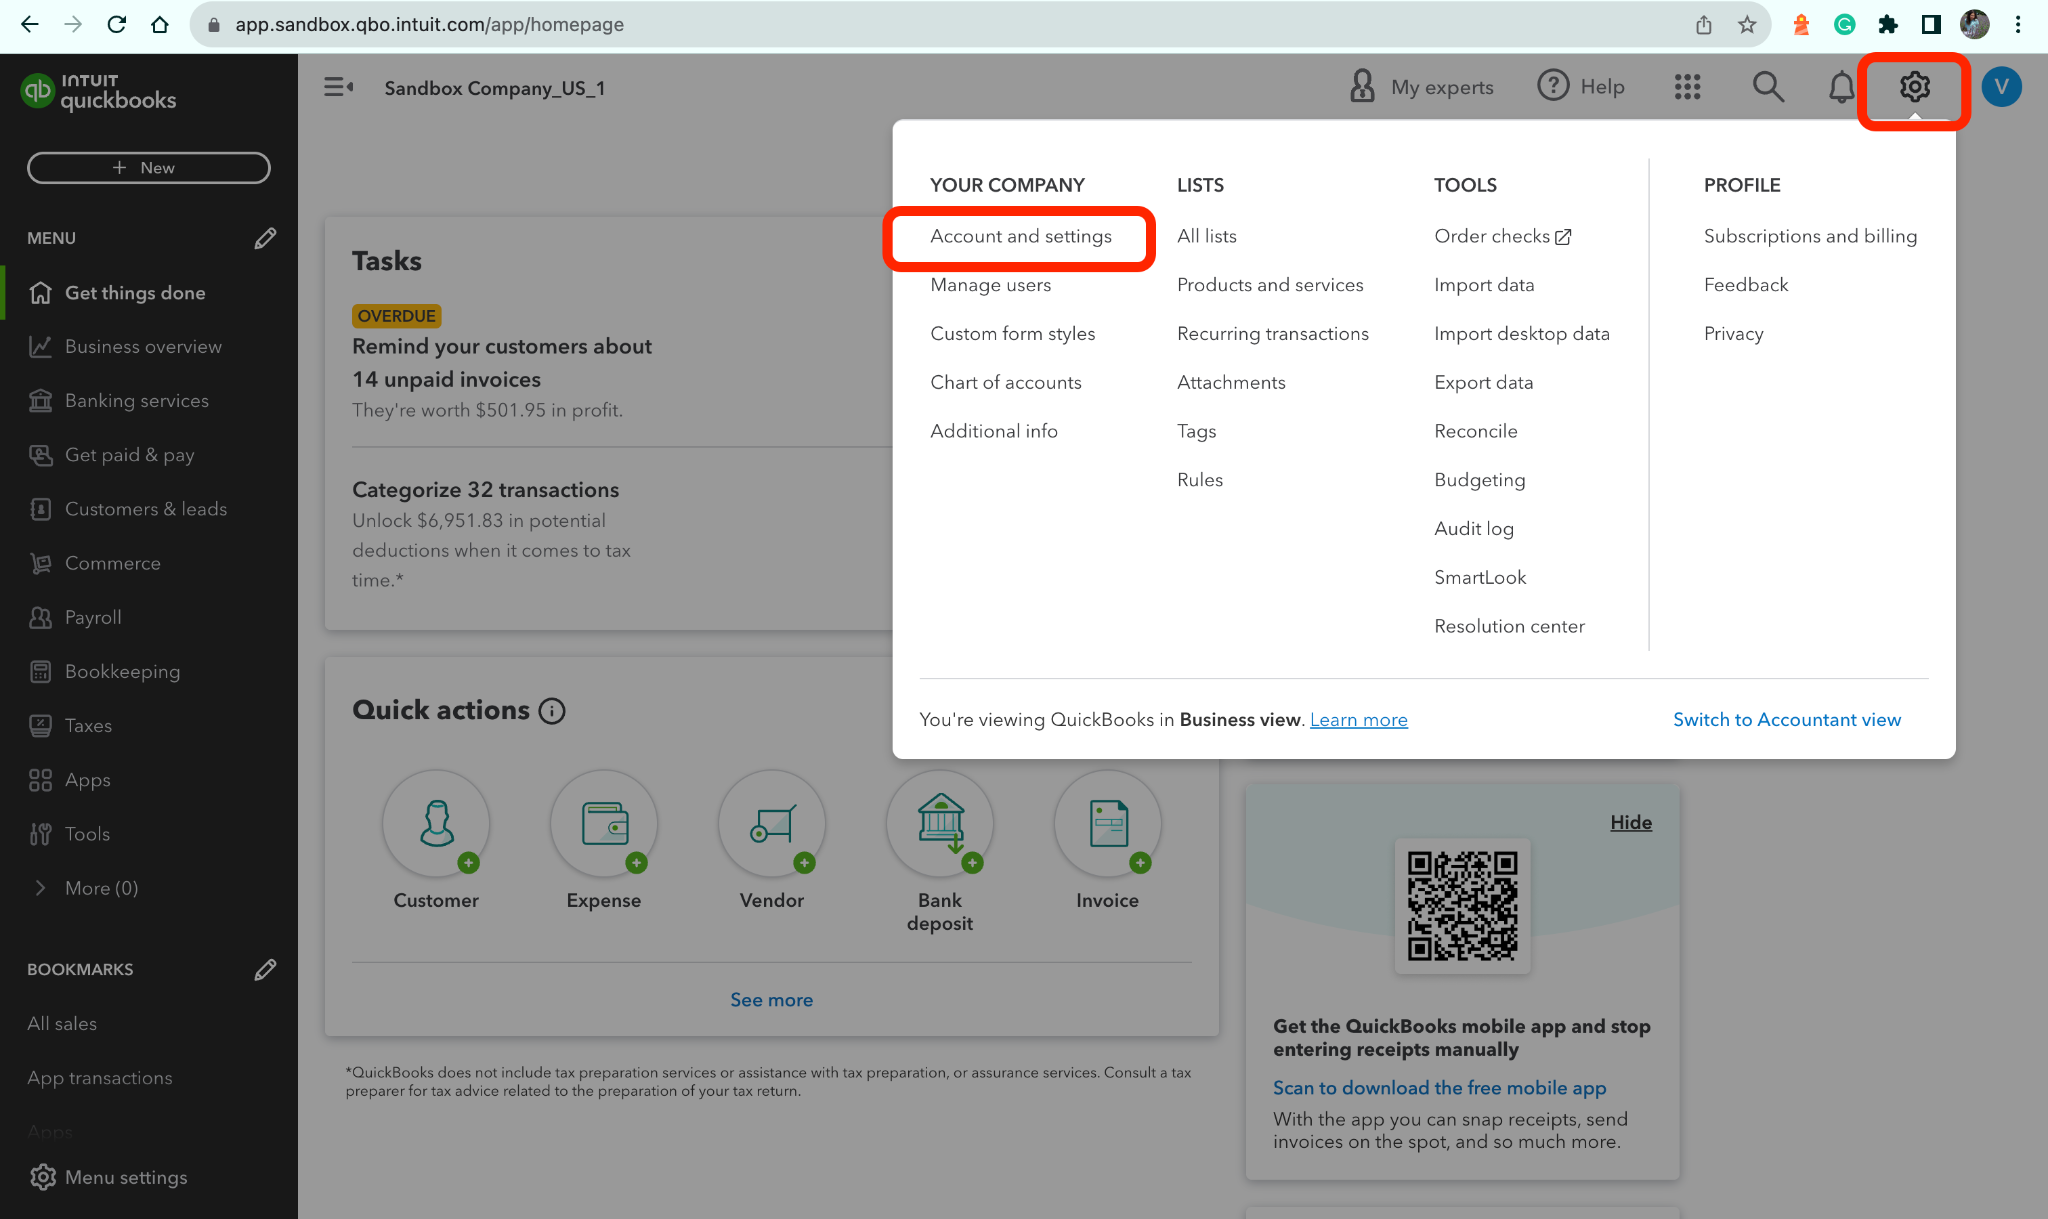
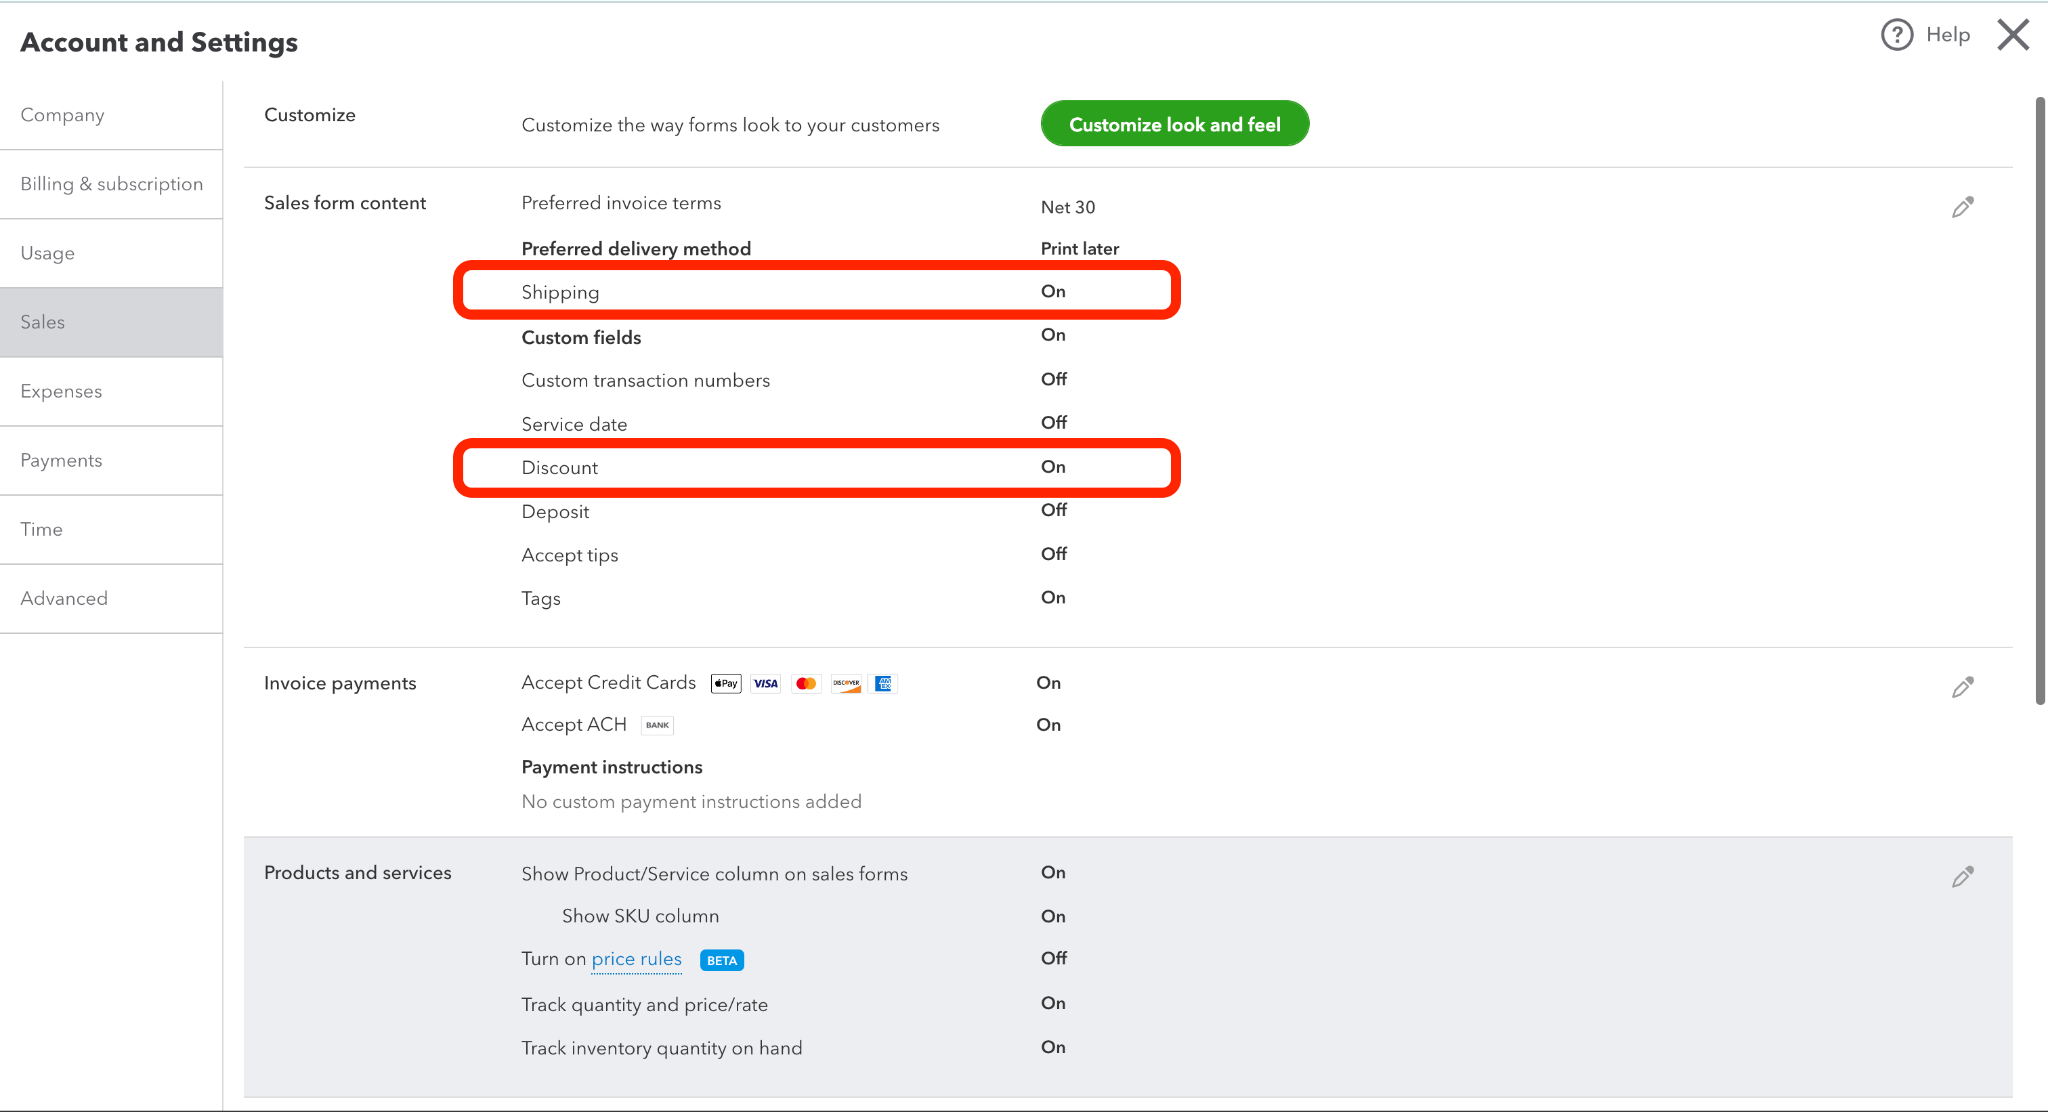
Shipping and Discount Costs Activation in Invoice:
To activate shipping and discount costs in the invoice, click on the Gear icon in QuickBooks, select Accounts and Settings, and then select Sales.
Refer to the Sales form content and ensure the Shipping and Discount are on:
QuickBooks Plugin Action Emails:
In case your System admin didn’t set up the crone script that will refresh the token automatically, the admin will get the action email in 14 days before token expiration. Use email lexem {quickbooks:refreshTokenExpiresAt} in your email: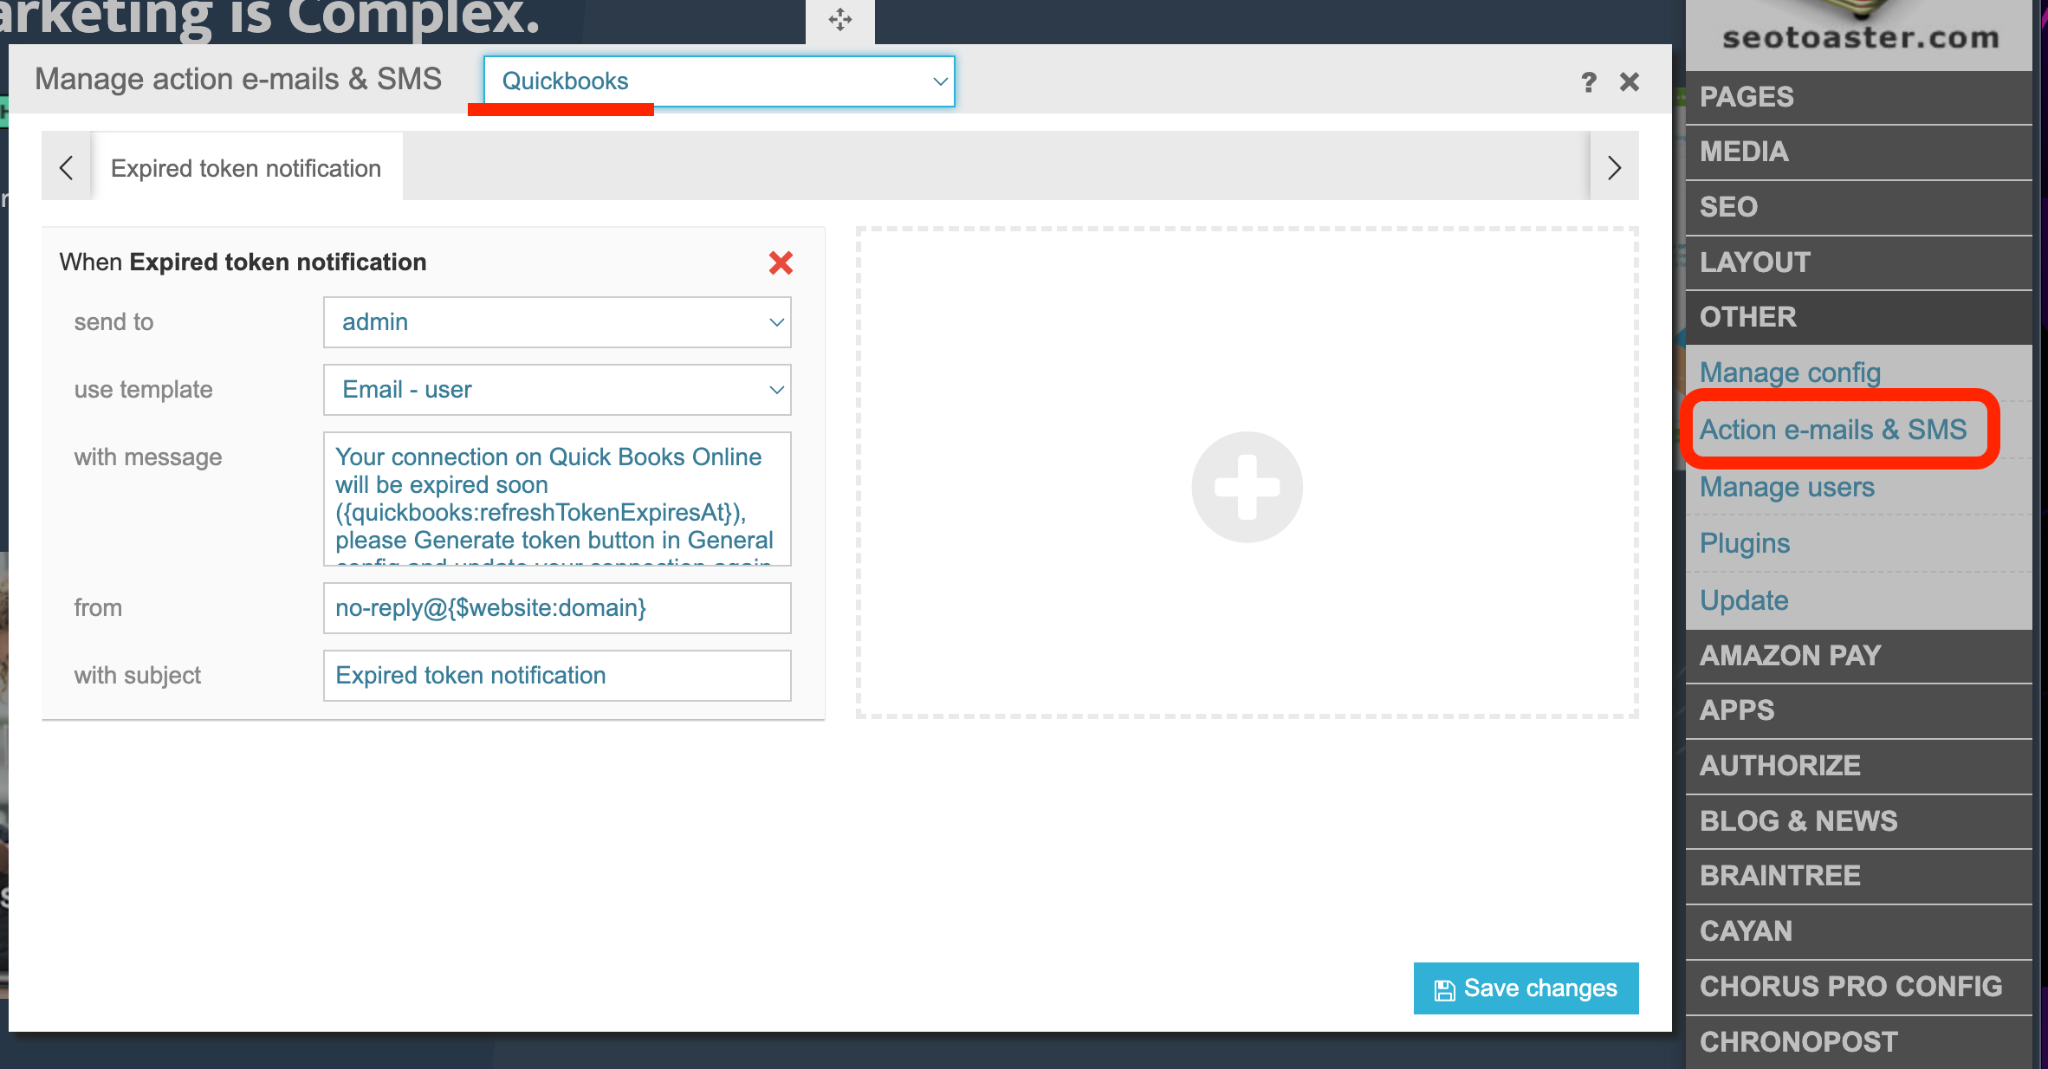
View Payments and Transactions in Quickbooks:
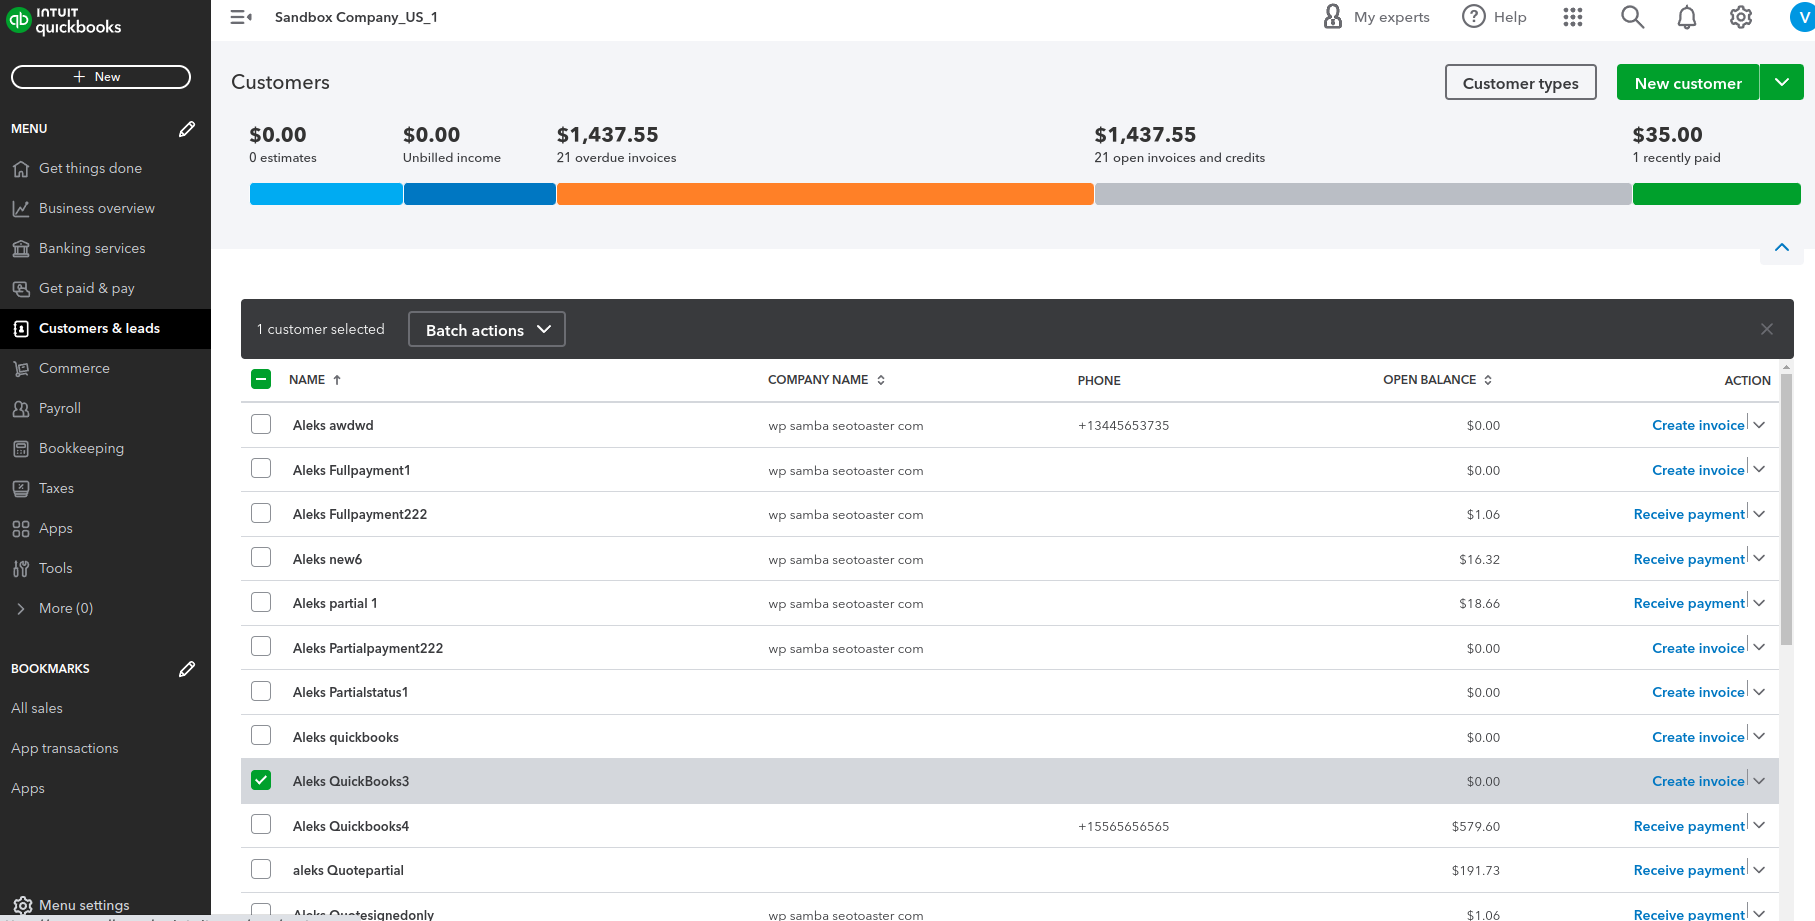
Customers List
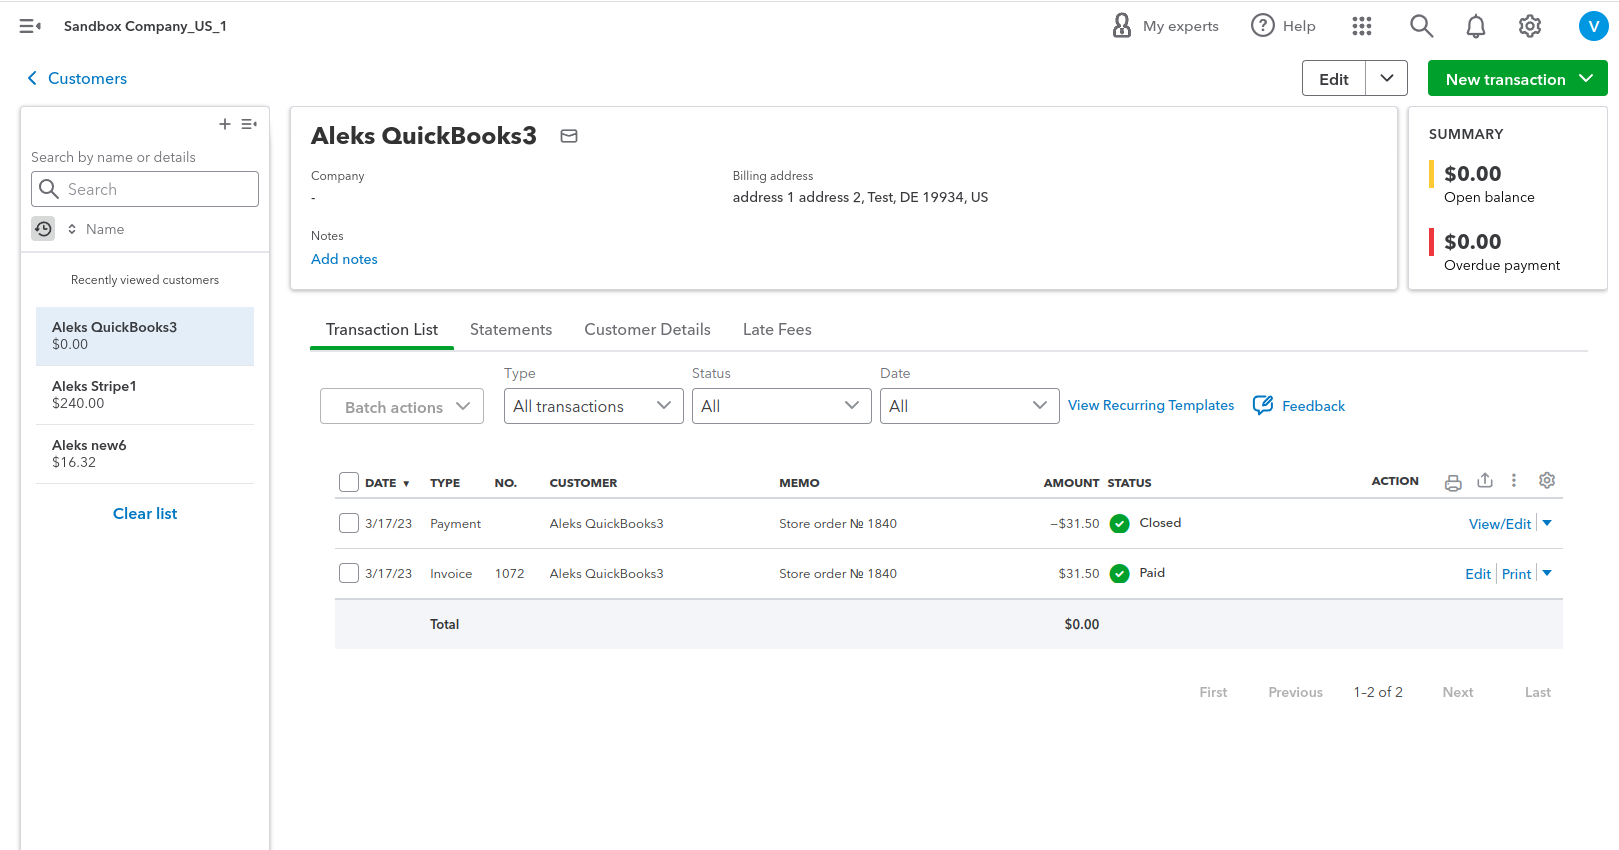
Transaction List
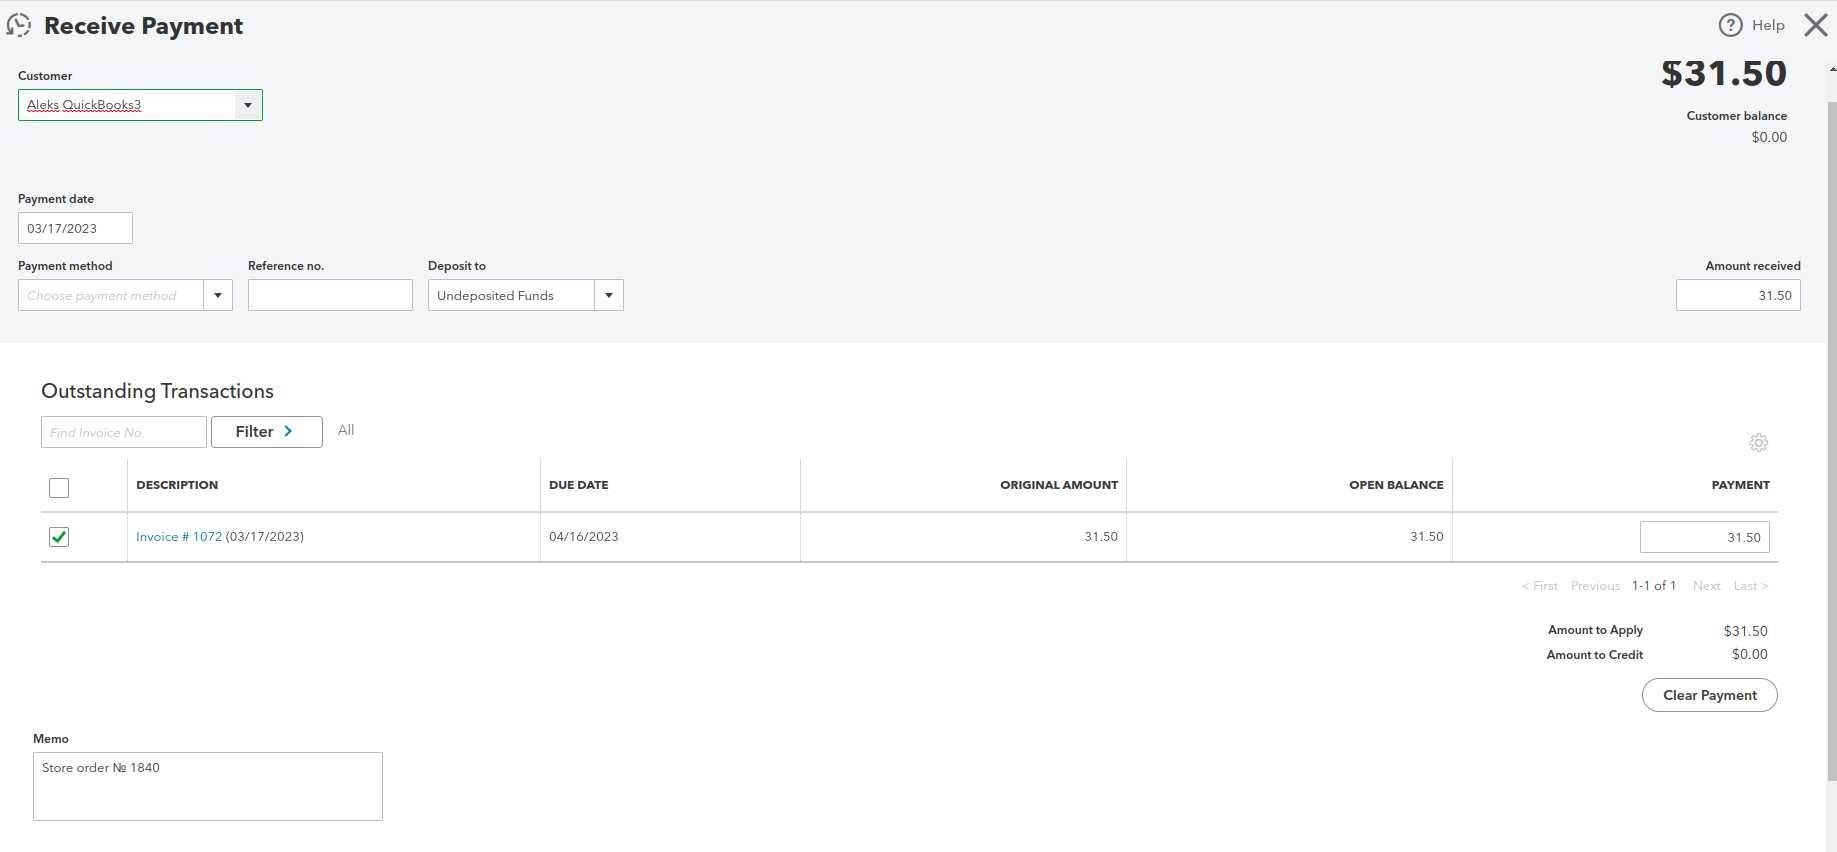
Outstanding Transactions
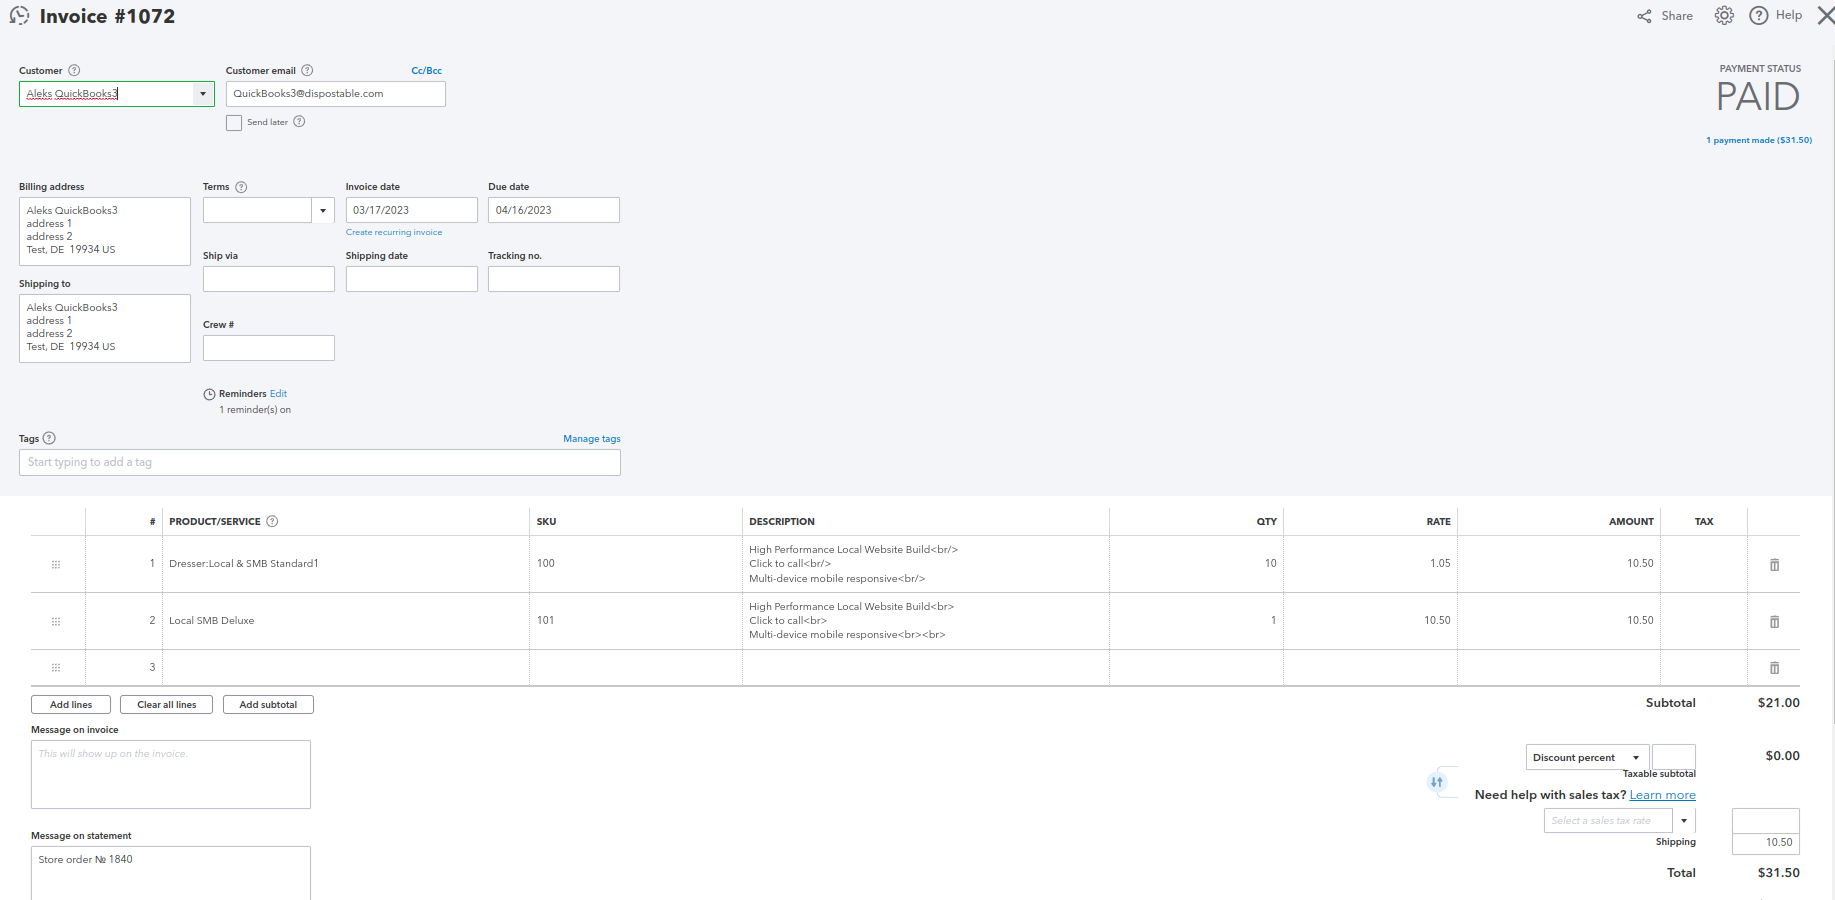 Invoice
Assessment Questionnaire: